
Please note that nobody is informed when people leave questions on system articles. If you need help, use the forums.
How to make SVG maps
▲
6▲ 6 ▼ 0
Overview of making SVG in Inkscape for use on CWSP
This public article was written by [Deactivated User], and last updated on 14 Oct 2015, 15:57.
[comments] cws help <noindex>
Hi everyone, this tutorial will guide you through the steps used to create SVG maps for use with CWSP's mapping tools. In this tutorial, we will be using the program Inkscape to draw and save our maps. There is also a tutorial for Adobe Illustrator. Once you have downloaded, installed, and opened this program, let's begin.
This tutorial will make an svg map that is neutral in colour, and has white spaces between each division. The CWSP tools do not function so well when the objects have borders, so this method will still create a visible line between each division, while still being optimal for use with our tools.
[top]Step 1: Starting your canvas

You'll see in the above image that we have a blank canvas. I would highly recommend using something with higher dimensions so that the image can scale nicely if it is made larger. In this image, I have used the dimensions 1200px wide, by 900px high. You can alter the canvas size by using Ctrl+Shift+D.
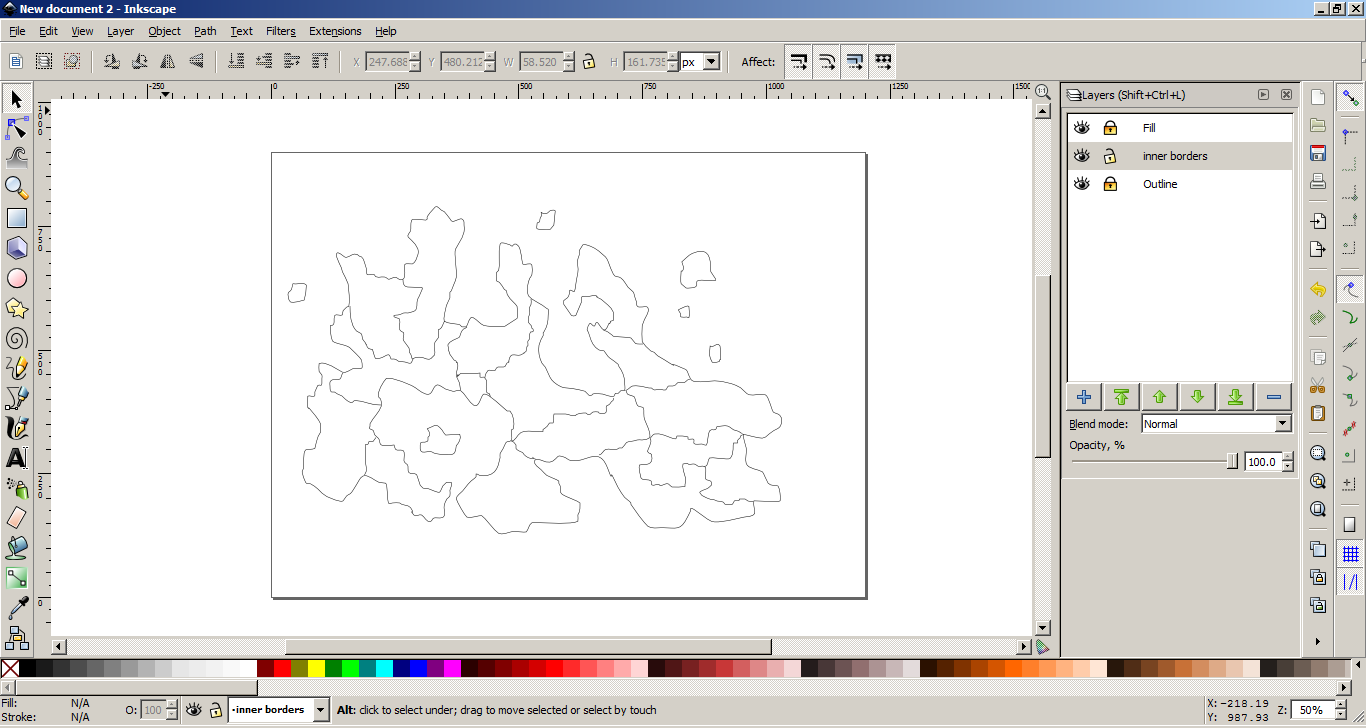
[top]Step 2: Layers!

For this, I create two main layers. To see the list of layers, press Ctrl+Shift+L. You can use the + button to add more layers. In this case, we have one layer on the bottom for the outline of the country, and one above that for the fill. For now I have locked the 'Fill' layer as we only want to edit the outline.
[top]Step 3: The outline

Using the pencil tool (see it pressed on the left-hand side?) draw the outline for the country and the islands that you want to create the map for. Here I've drawn an ugly island with some other random islands around it.
Tip: If you want to trace an existing map, add another layer under all the others and paste your image into here. Then you can trace around the outside on the 'Outline' layer, then hide/delete the original image once you're done with it.
[top]Step 4: The other lines
Next we want to use the pencil tool to draw the lines showing the divisions in the country. Take care to make sure there are very small to no gaps between the lines as this may affect later steps.
Tip: In this screenshot, I have created a new layer for the division lines so that I can hide them at will if I want to use the country outline for another purpose later.
[top]Step 5: Filling the divisions

Make sure you lock all the layers, and unlock the 'Fill' layer. Select the 'Fill bounded areas' tool (the tipped bucket icon) on the left-hand side. Select which colour you wish to fill this with.
Tip: I would recommend sticking to a neutral colour in order to keep the map easy to look at, and increase the contrast when the divisions are highlighted later. I tend to use 'Grey 20%'.
[top]Step 6: Hiding the outlines

Click the eye icons in the layer toolbox to hide the outline layers you have only leaving the fill layer visible. This is what your final map looks like.
[top]Step 7: Assiging IDs
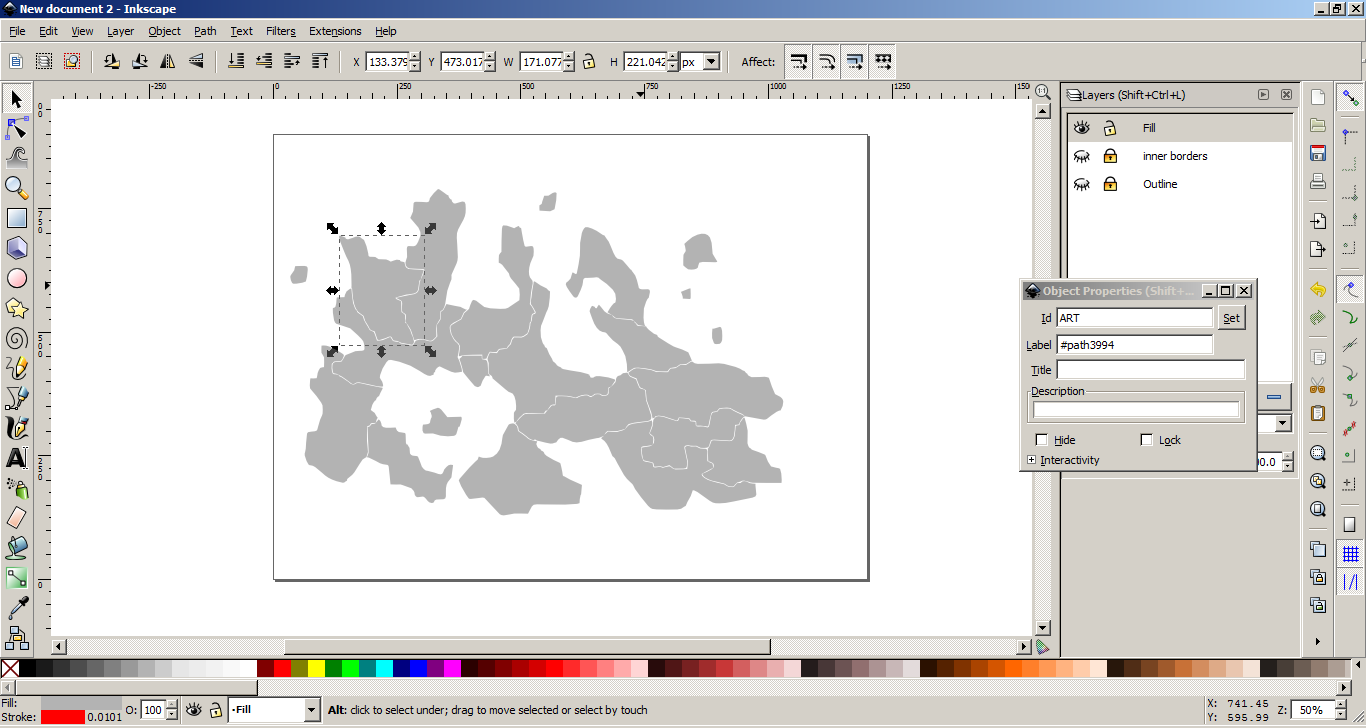
In order to use the tools on CWSP, you need to assign an ID to each division so that we know which one is which. In order to do this, start by pressing Ctrl+Shift+O; this will open the object properties toolbox.
You then need to select each division/object and assign and ID to it using the "Id" field. You can enter a Label, Title, or Description as well; however these are not necessary. Each ID needs to only contain ASCII characters (meaning A-Z or 0-9 only) and must start with a letter only (for best results, avoid using numbers at all). Using anything else will leave parts of your map non-functioning.
Tip: If you have a division that is more than one object (such as a part of the mainland, plus some offshore islands), then you first need to group these, then assign the ID to the group, rather than the individual sections. You can group these by selecting all the areas you wish to group, then pushing Ctrl+G.
Extra tip: Make note of the IDs you've used somewhere as you'll later need to define these on CWSP.
[top]Step 8: Saving the document
Next you need to save the document (no screenshot as you should know how to do this). If you want a version specifically for uploading to CWSP that is separate to your main version of this map, you can do so. If you do have a specific version for CWSP, we'd recommend deleting any unneeded layers.
[top]Step 9: Upload to CWSP
Create your country and upload your map!
Comments


